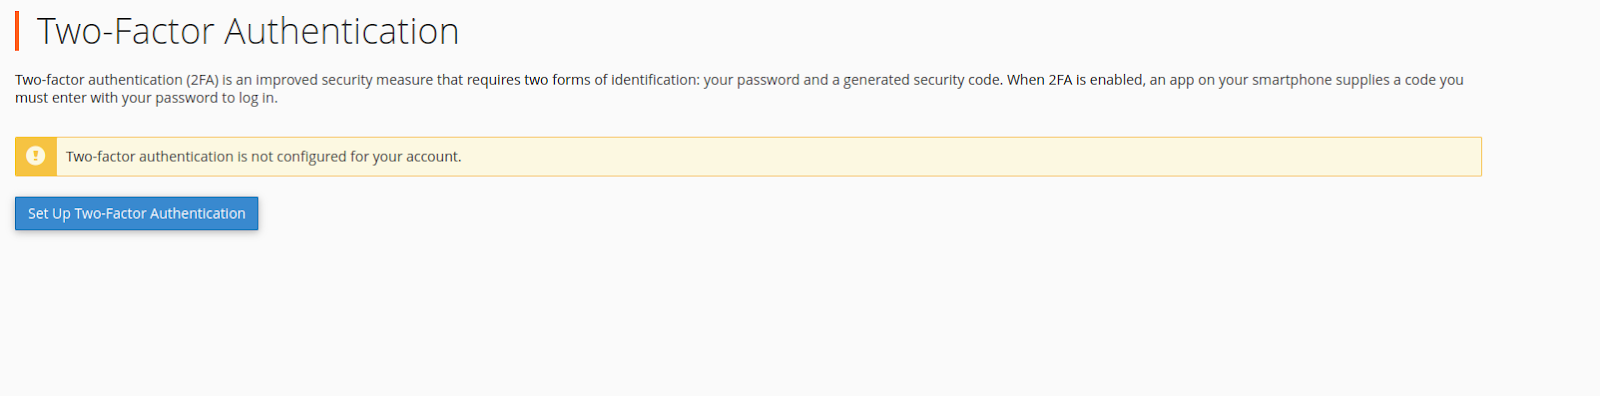
Two-factor authentication (2FA) is an upgraded security technique that requires two kinds of identification: your password and a generated security code.
When 2FA is enabled, a smartphone app will send you a code that you must enter together with your password to log in. You can’t log in without your smartphone.
You can install one of the below apps on your smartphone.
- Google Authenticator-for Android, iOS, BlackBerry OS, and Windows Phone
- GAuth Authenticator extension-for Google Chrome browsers
- Duo Mobile -for Android and iOS
- Microsoft Authenticator-for Android, iOS, and Windows Phone
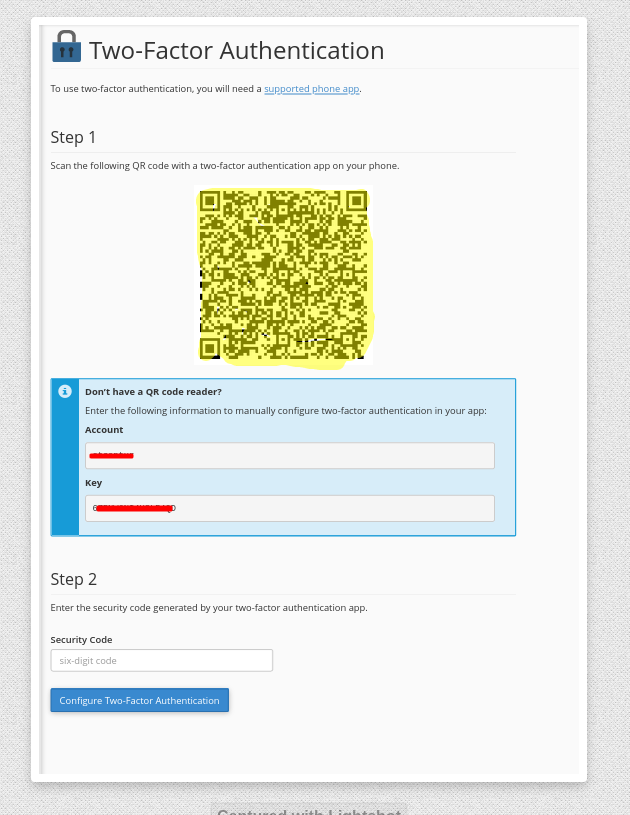
- Login to your cPanel.
- Go to security tab and click on two factor authentication.
- There are 2 methods for syncing the app:
- Create the link automatically by using your app to read the presented QR code.
- Create the link manually in your app by entering the supplied Account and Key information.
Google Authenticator
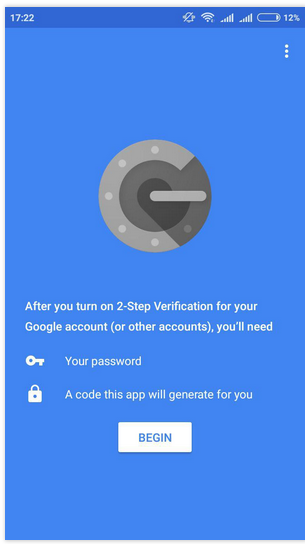
- The following start page will appear if you continue using the Google Authenticator app. To complete the app’s setup, select Begin:
- If you already have a key added, you must click the “+” button to add another key:

- Scan a barcode or enter the given key to add an account:

- If the Scan a barcode option is selected, the camera app will launch, and you will need to place the QR code from the cPanel inside the visible red lines.
- You can also select the Enter a supplied key option. You will be directed to the following screen, where you must enter the information that was previously entered in the cPanel:
- Account name
- Your key

- You can continue with other configurations once the key has been added to the Google Authenticator app.
Seeking a secure web hosting solution? Discover one of the best managed and secure web hosting services, complete with free migration, at: https://www.Webhostuk.co.uk/web-hosting.html.