Introduction:
Your webmail holds important information, so it’s wise to add an extra layer of security. That’s
where Two-Factor Authentication (2FA) comes in! It’s like having a double lock on your digital
mailbox.
This guide will walk you through enabling 2FA for your cPanel webmail, step-by-step. It’s a quick
and easy process that significantly boosts your email security. Only CloudLinux 8 and higher,
and beginning with cPanel 114, you can setup two-factor authentication in webmail. To work,
two-factor authentication must be enabled in WHM and added to the account’s feature list.
What is 2FA?
Think of 2FA as an extra security checkpoint. When you log in to your webmail with your
username and password, 2FA asks for a unique code in addition to that information. This code
is usually generated by a special app on your phone, so even if someone hacks your password,
they can’t access your email without your phone!
Why Use 2FA?
- Extra Protection: It adds a significant layer of security to your webmail account.
- Peace of Mind: Knowing your email is extra secure gives you peace of mind.
- Easy to Use: Setting up 2FA is a breeze, and using it is even easier!
Things You’ll Need:
- A smartphone with a compatible authenticator app (like Google Authenticator).
- Your cPanel login credentials.
Steps to Enable 2FA:
- Log into your webmail account by entering your username and password. Typically, you can access webmail by browsing to https://yourdomain.com/webmail, where “yourdomain.com” is your website’s domain.
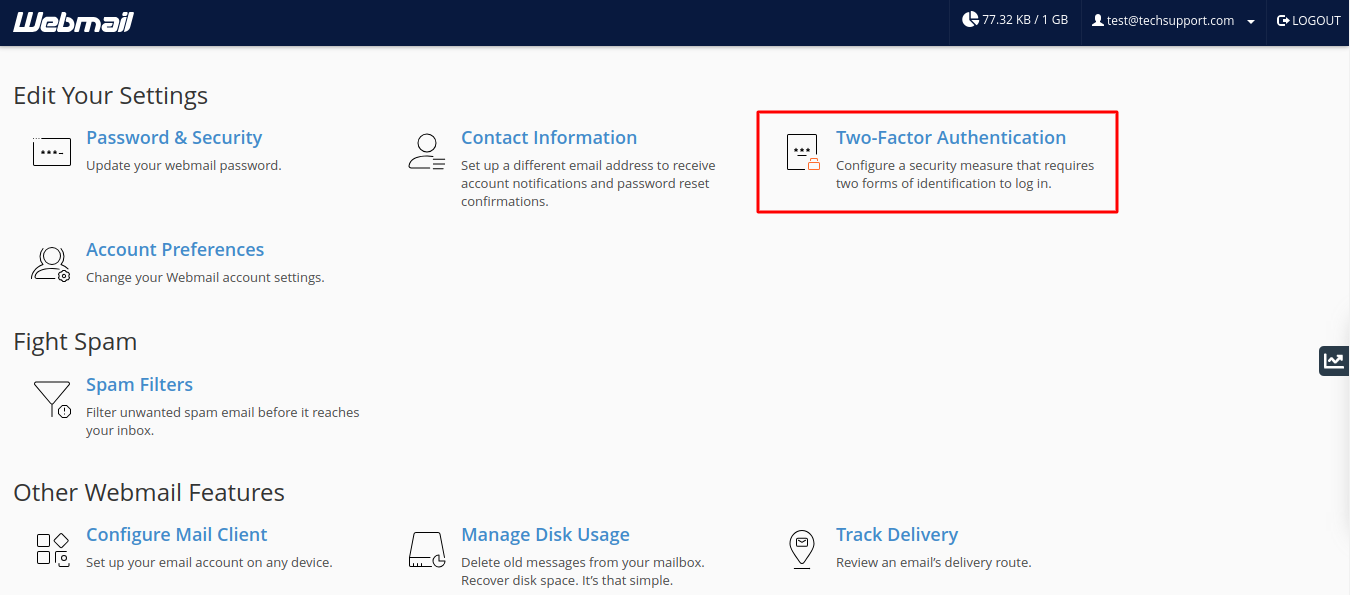
- Choose Two Factor Authentication from the Webmail management screen (before to logging into RoundCube), located under the Edit Your Settings section.
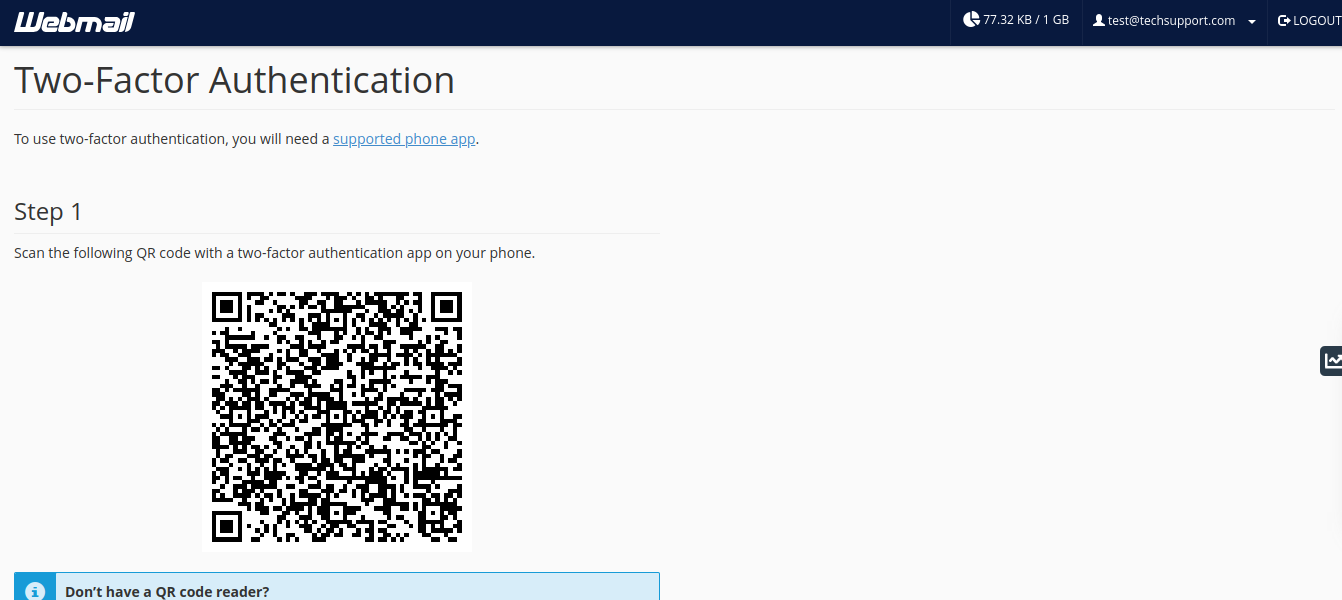
- Set Up Two-Factor Authentication: Click the button to initiate the setup process. You’ll likely be given two options:
- Scan a QR Code: Open your authenticator app on your phone and scan the QR code displayed on your cPanel screen. The app will then generate a unique code for your cPanel account.
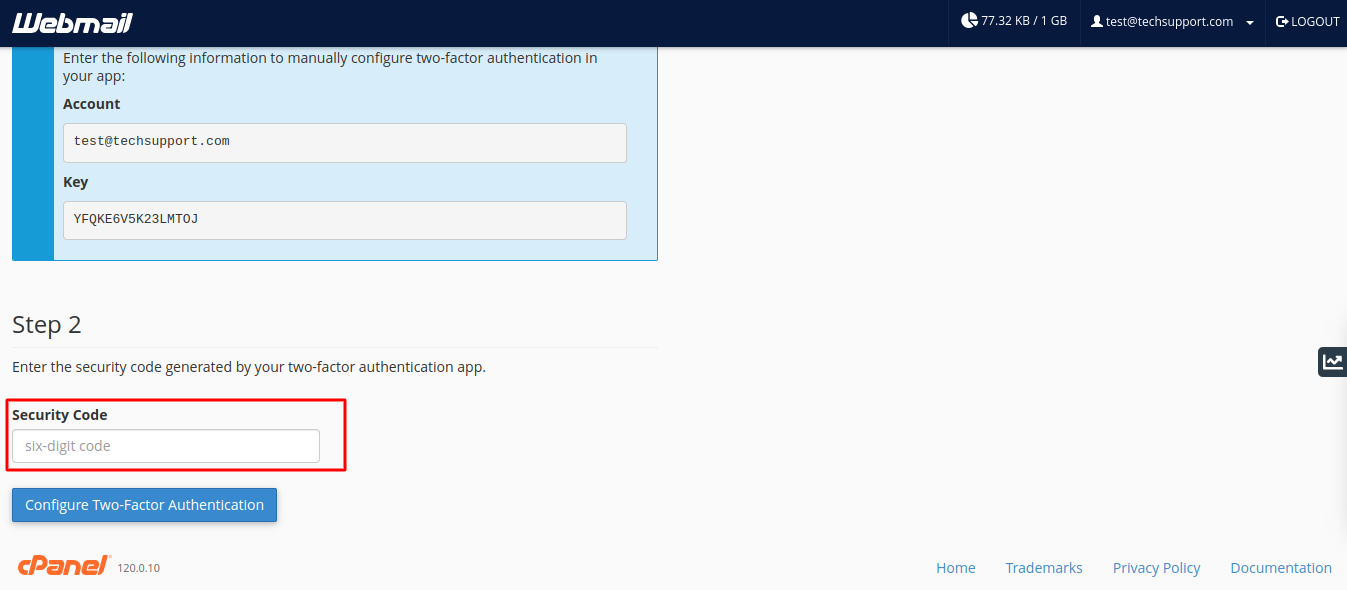
- Manual Entry: If scanning a QR code isn’t an option, you’ll be provided with an “Account” and “Key.” Enter this information manually into your authenticator app.
- Enter the Security Code: Once you’ve linked your authenticator app with cPanel, the app will generate a unique security code. Enter this code in the designated field on your cPanel screen.
- Configure Two-Factor Authentication: Click the button to confirm and activate 2FA for your webmail.
You’ll get this message after 2FA has been successfully set up.

Congratulations! You’ve successfully enabled 2FA for your cPanel webmail. Now, whenever you
log in, you’ll need both your password and the unique code from your authenticator app. To
verify and enter your 6-digit code, which is updated every 30 seconds, log into your webmail.
Bonus Tip: Consider keeping a backup of your 2FA recovery codes provided during setup.
These can be helpful if you lose your phone or can’t access your authenticator app.
By enabling 2FA, you’re taking a big step towards securing your online communication.
Happy secure emailing!