When you develop a WordPress website on your local machine and wish to migrate to your cPanel hosting you can follow below steps :
Step 1: Create a database and import the database
1 – Create a domain on a new server where you want to migrate WordPress
2 – Login to old cPanel and go to PhpMyAdmin

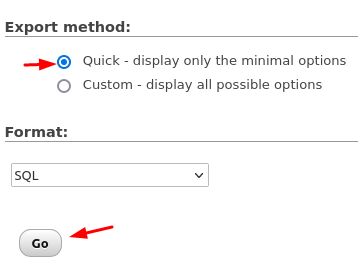
3 – Select the Database and click on Exports >> select “Custom” >> select “SQL” and now “Go”
4 – Now the system will download a database to your local machine.
5 – Go to the new cPanel and create a new database and assign the user


6 – Now go to PhpMyAdmin and select the database and click on “Import”

7 – Choose the database file and click on “Go”
Now change the website URL
1 – Go to PhpMyAdmin and select the database
2 – Select the table wp_options and click browse

3 – Select the site URL and click on edit and change the site URL

Database settings
1 – Now go to new cPanel and click on file manager

2 – Go to “public_html” and select the “wp-config” and click on edit
3 – Now edit the db_name, db_user and db_password (not:: the database entries should be same as you created above)

4 – Don’t forget to match the database entries
Save the changes in the WordPress
1 – Log in to the WordPress dashboard.
2 – Navigate to the General interface (Main » Settings » General).
3 – Click Save at the bottom of the interface.
4 – Navigate to the Permalink interface (Main » Settings » Permalink).
5 – Click Save at the bottom of the interface
Step 2: Migrating Files from old cPanel
1 – Login to your cPanel
2 – Enter in File Manager and go to public_html


3 – Select all the files inside the public_html

4 – Right click on it and compress all the files using Zip Archieve option


5 – Now upload the compressed file in our new cPanel account
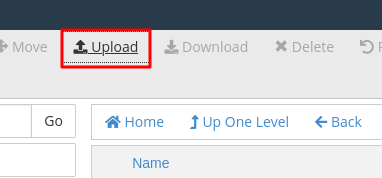

6 – Click on the Extract once you have uploaded the archive.

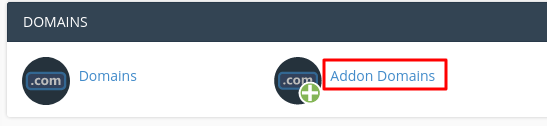
Additional Step: Create Addon Domain
Tip: If you are moving a website to a cPanel where there already are living websites, and it’s not set as the main domain for the account, you will need to add this domain in the cPanel > Addon domains option. In this case, the directory for the website (also known as Document root)
Save these instructions to rest assured you are ready for your next WordPress migration!
If you are looking for Managed WordPress Hosting with free migration and world class WordPress hosting on Super-fast NVMe storage cloud Hosting do checkout our WordPress specialized plan at :
https://www.WebhostUK.Co.UK/wordpress-hosting.html
Author – Preston