
Introduction
QUIC.cloud is the first and only content delivery network with the ability to cache dynamic WordPress pages. Using QUIC as the transfer protocol, QUIC.cloud will make your website faster and more secure than the competition.
Litespeed’s QUIC.cloud is a new way to supercharge your website.
QUIC.cloud CDN, an intelligent cache CDN based on LiteSpeed Cache, is the only CDN service that can accurately cache dynamic pages (pages that can change frequently).
LSCache for WordPress knows when to automatically purge and sync data in QUIC.cloud CDN, giving it the upper-hand on all other CDN providers. Users can now provide anyone across the globe access to their sites in less than 100ms!
Also, new to QUIC.cloud is image optimization, critical CSS, and LQIP. With these new services readily available, QUIC.cloud is more customizable and efficient than ever before.
After reading through this guide, if there is something you do not understand, please let us know by sending an email to support[at]quic.cloud.
Requirements
Before you can utilize QUIC.cloud, you should refresh your LiteSpeed Cache for WordPress module to in any event v3.0.
Ths guide also assumes you already have a domain setup with WordPress. If you do not yet, please check out WordPress’ Domains guide.
Matching WordPress and QUIC.cloud
To begin, sign into your WordPress dashboard for the domain you’d like to use with QUIC.cloud.
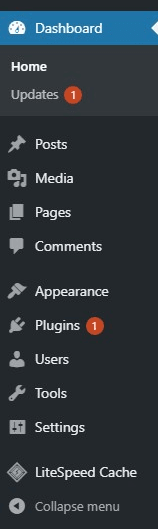
At that point explore to the menu bar on the left half of the site, and float over LiteSpeed Cache.
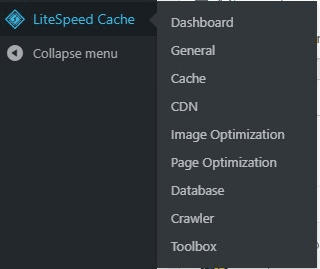
Then, select General.
On that page there will be a box for a Domain key; click the link Apply Domain Key, on the right side of the box.


You will see a bar at the top saying you applied successfully and to wait for the result. Please refresh the page.

After refreshing, the box should be automatically filled with the key. Next click Save Changes in the right corner.

Once you save, click Link to QUIC.cloud.

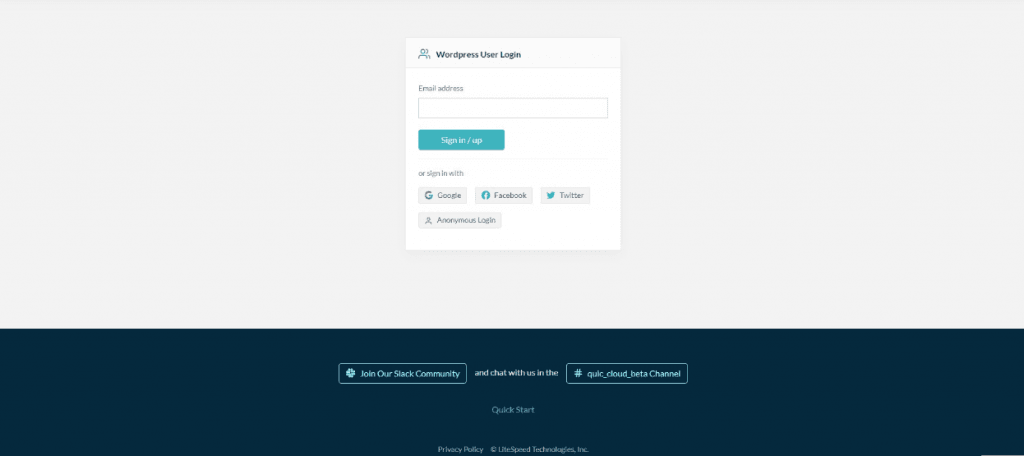
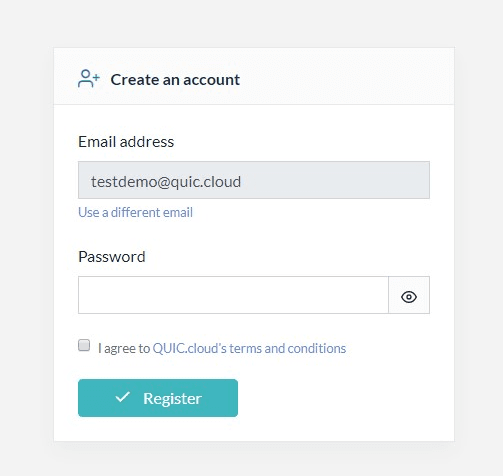
Next you will be redirected to QUIC.cloud to sign up/login.
If you login, you will be redirected back to your WordPress dashboard.
If you sign up, you will be asked to fill in your desired password and to agree to the QUIC.cloud terms and conditions. Then click Register.
Check your emails for a message from QUIC.cloud and confirm your account.

Once you click the activation link, a new tab will open saying the activation was successful.

Click My Dashboard and you will be redirected back to the WordPress dashboard.
Back on the WordPress dashboard, there is a button that will direct you to your QUIC.cloud dashboard.

Once on the QUIC.cloud dashboard, you will see the new domain listed.
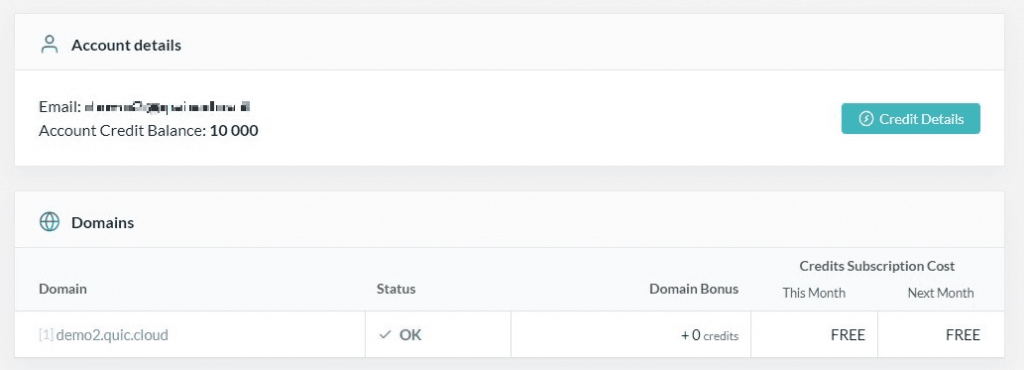
When you click into the domain, you should see a list including our CDN and the services offered.
If you’d like to use the CDN, please continue on to the next section of this document. If you are not interested in using the CDN, however, then you have successfully finished your setup. Congratulations and welcome to QUIC.cloud!
Setting up the CDN
Before a domain can use QUIC.cloud CDN, the DNS for that domain must be properly set up. Please follow the instructions below to set up your DNS.
DNS Setup
If you are not sure about how the DNS works, check out our DNS Primer. You will need to be logged into your WordPress admin and your DNS management page.
Note - The base domain, e.g.example.comis known as the Root or Apex Domain. All other usages of this domain such assub.example.comorwww.example.comare subdomains.
If you are adding the root domain to QUIC.cloud, refer to the following section. If you are adding a subdomain, refer to the subsequent section.
Adding the Root(Apex) Domain
QUIC.cloud requires that your DNS maps your domain to a domain provided during setup. This means that your DNS provider must support domain to domain mapping for the Root domain.
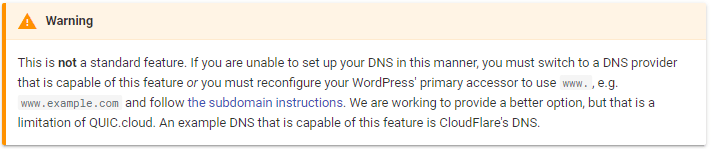
The following instructions have screenshots from the CloudFlare DNS manager.
- Take a screenshot of your current configurations. Keep this as a reference in case things go wrong, so you have something to go back to.
- Check what your TTL value is and adjust it to the smallest value possible (if not already). You will need to wait until the old DNS records expire before you can use QUIC.cloud. After the old value expires, every record should be using the new value. Example: previous value: 1 hour, new value: 2 minutes. If it is 3pm when you change the value to 2 minutes, you must wait until 4pm to be sure that all the records now use the 2 minute value.
- (Optional) If you wish to use both the root domain and the
www.subdomain: Create a CNAME record pointingwww.to your Root domain:
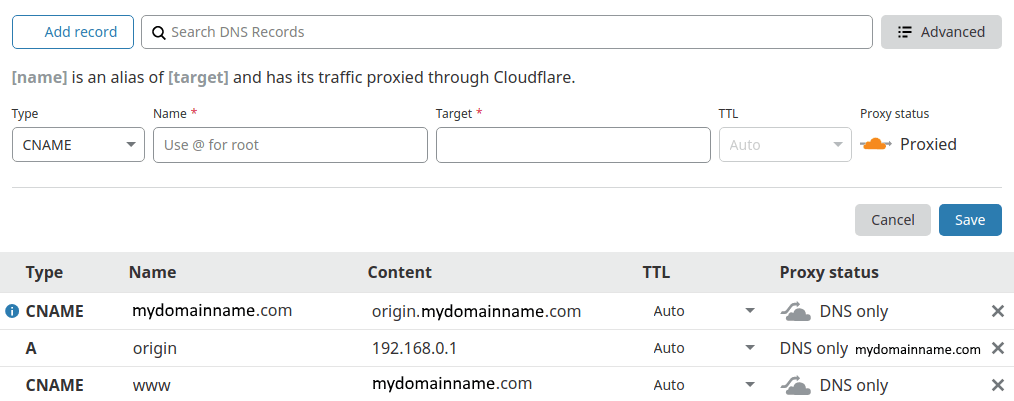
If you have a www. record already, edit that to look like the above screenshot. The net result is that www.example.com will target the same server as example.com.
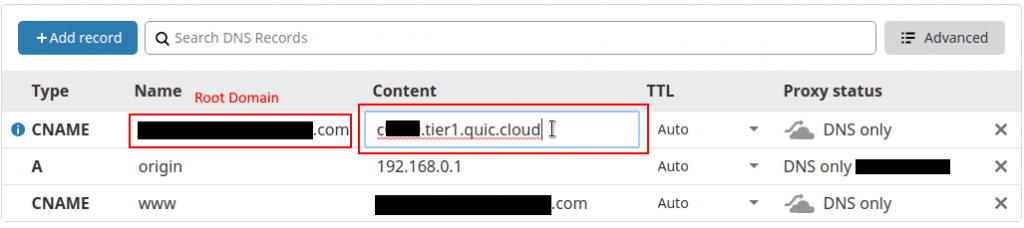
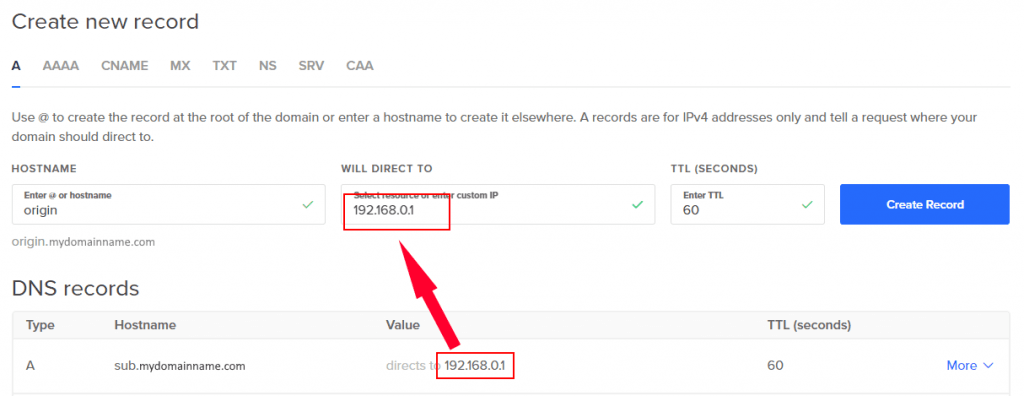
4. Create an A record for a random subdomain that points to your origin IP. For example, origin.example.com.
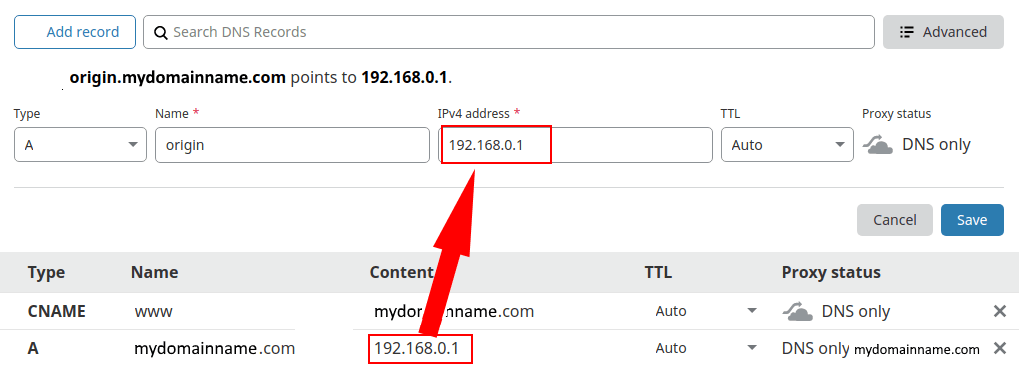
1.Convert your current record for @ to a CNAME record targeting the subdomain you created in step 4.
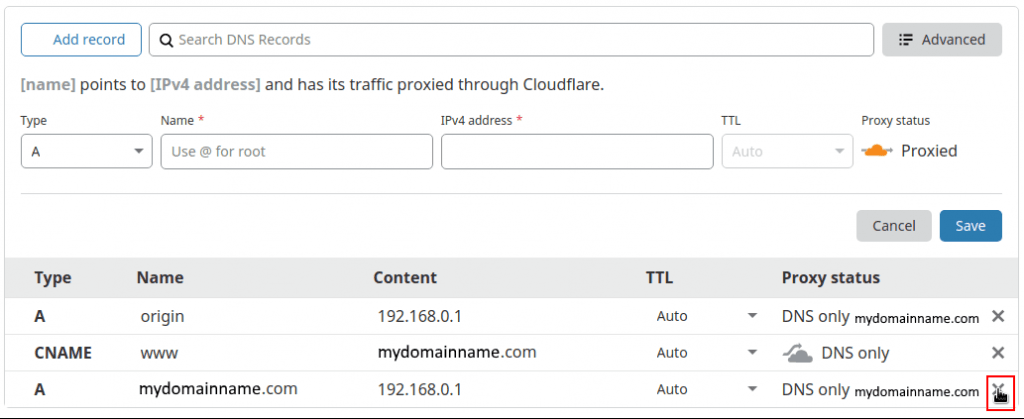
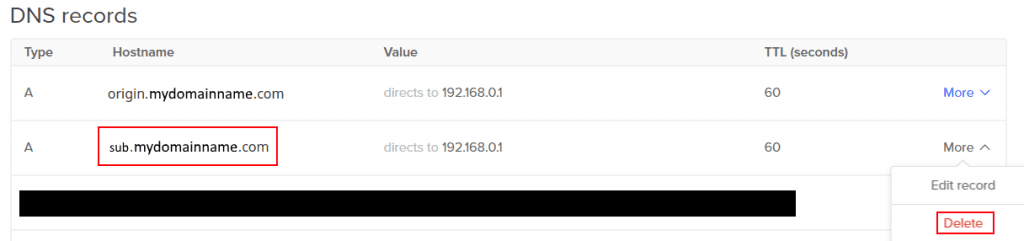
Deleting the root domain record:
Note – The below screenshots are for deleting an A record and adding a CNAME record. If your current record is a CNAME record or your DNS Manager allows changing record types, you can just edit the record.
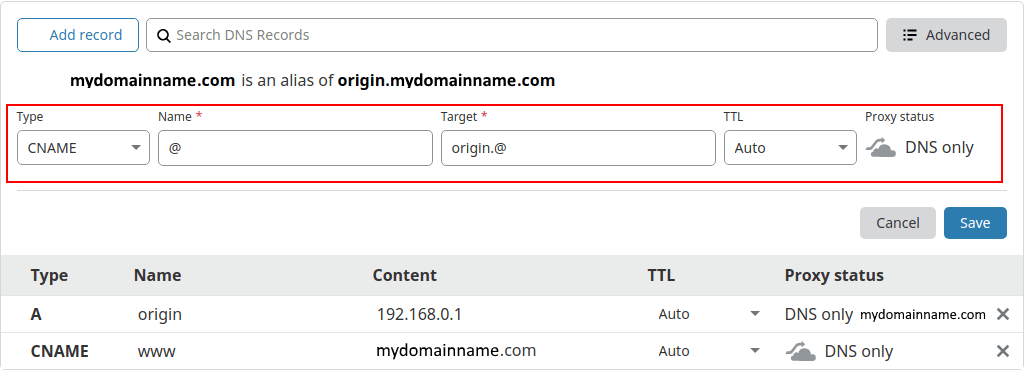
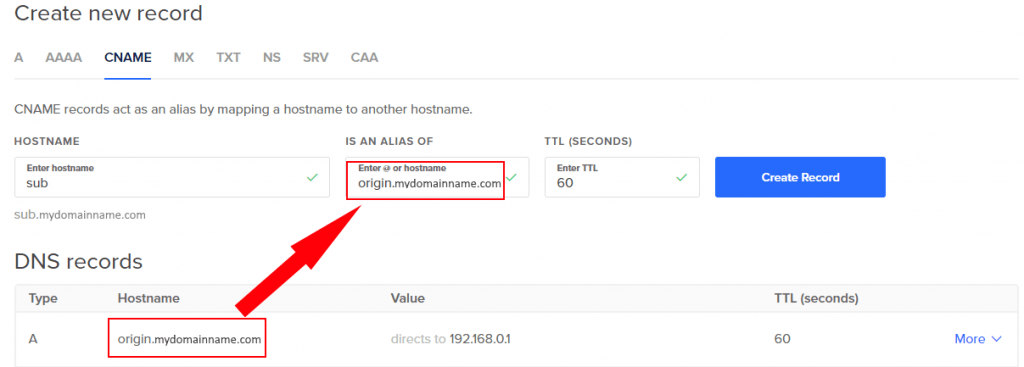
Setting the CNAME record for the root domain:
Make sure that your site is still accessible as is. Here are some ways to test.
Note – If you are using CloudFlare DNS, ensure that the cloud is set to “Grey” (this means you are not actually using Cloudflare for anything other than the DNS).
After performing the above steps, the following should be true: * Your site is still accessible. Nothing should have changed. * If you performed step 3, your www. subdomain should also point to your current IP. Refer to how to check the DNS. * The random subdomain should also target the same IP.
If any of the above are not true, review your DNS configurations and run through the steps again. One possible reason that the above are not true is that the TTL for the old configuration has not expired yet. Make sure that the time has elapsed.
Adding the Subdomain
The following instructions have screenshots from the Digital Ocean DNS manager. The steps should be similar for your DNS provider.
- Take a screenshot of your current configurations. Keep this as a reference in case things go wrong, so you have something to go back to.
- Check what your TTL value is and adjust it to the smallest value possible (if not already). You will need to wait until the old DNS records expire before you can use QUIC.cloud. After the old value expires, every record should be using the new value. Example: previous value: 1 hour, new value: 2 minutes. If it is 3pm when you change the value to 2 minutes, you must wait until 4pm to be sure that all the records now use the 2 minute value.
- If the subdomain points to the same origin server as the Root domain, this step is not required. Create an A record for a random subdomain that points to your origin IP. For example,
origin.example.com.
- Convert your current record for the subdomain to a CNAME record targeting the subdomain you created in step 3. If you are using the root domain as the base, target that instead.The below screenshots are for deleting an A record and adding a CNAME record. If your current record is a CNAME record or your DNS Manager allows changing record types, you can just edit the record.
Deleting the old record:
- Make sure that your site is still accessible as is. Here are some ways to test. If you are using CloudFlare DNS, ensure that the cloud is set to “Grey” (this means you are not actually using Cloudflare for anything other than the DNS).
After performing the above steps, the following should be true: * Your site is still accessible. Nothing should have changed. * The random subdomain should also target the same IP.

If either of the above are not true, review your DNS configurations and run through the steps again. One possible reason that the above are not true is that the TTL for the old configuration has not expired yet. Make sure that the time has elapsed.
Enable CDN
When on your QUIC.cloud dashboard, click on the domain you’d like to enable the QUIC.cloud CDN service for.
Note – Domains can be listed in QUIC.cloud and use the QUIC.cloud services, without using the CDN.
Next, under the services list, click CDN.
Note - If the status of the CDN says ‘OK’, then your CDN is already enabled for that site and you do not need to continue with this guide.
On the following screen, click Enable CDN.
Next we will discuss the DNS records and verification.
Configure DNS Records and Verify
Update the DNS Manager
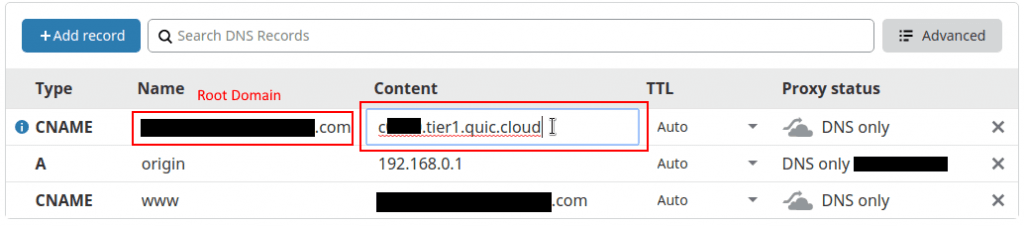
Note the CNAME record that we created for you, as below:
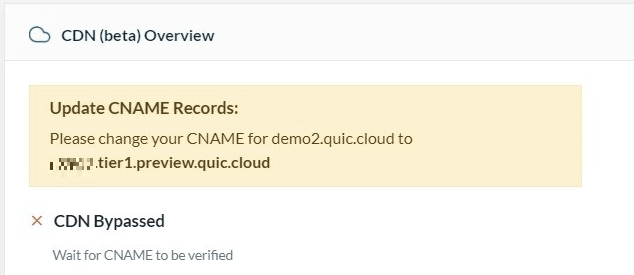
In your DNS Manager, change the CNAME you set up to point to this CNAME domain.
CloudFlare DNS Example:
At this point, nothing should have changed. Your site should still target your server. Here are some ways to test.
Configure Access for your site (Optional)
On the CDN page, under Setting -> Connection, there are three options that configure how the browser connects to QUIC.cloud and how QUIC.cloud connects to your origin server. Select the appropriate option.
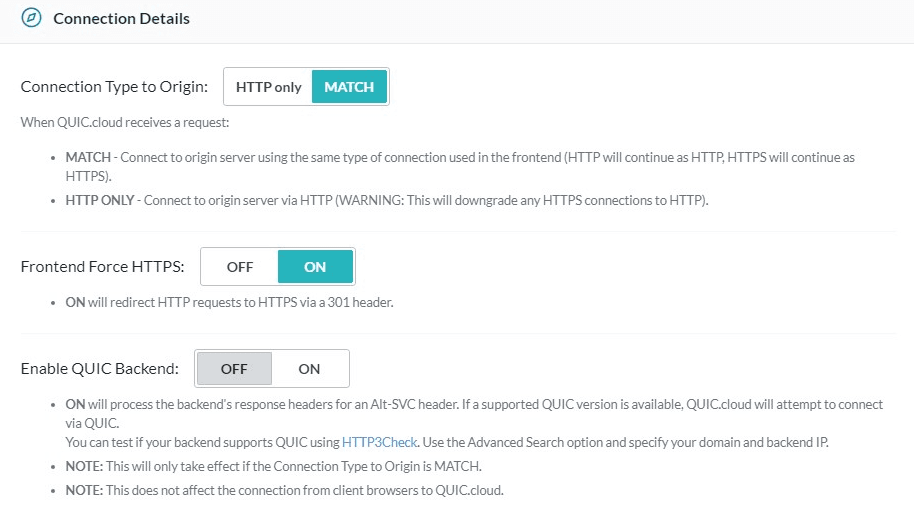
Connection Type to Origin: This option specifies the connection type between QUIC.cloud and your origin server. The available options are: match the connection type from the browser to QUIC.cloud or use HTTP Only.
Frontend Force HTTPS: This option specifies the connection type between the browser and QUIC.cloud servers. If set to ON, HTTP requests to QUIC.cloud are redirected to HTTPS automatically. Otherwise, both request types are forwarded to your backend server (depending on how Connection Type to Origin is configured).
Enable QUIC Backend: If your site offers QUIC and/or HTTP/3, you can try this option. This will let QUIC.cloud servers attempt to connect to your origin server using QUIC and/or HTTP/3.
Configure your Firewall
When your site goes through QUIC.cloud servers, all the requests will appear via QUIC.cloud IPs. This will likely trigger some firewall rules. Make sure to whitelist QUIC.cloud IPs so that the requests do not trigger the firewall.
Verify Your Website is Using QUIC
You must have a valid SSL Certificate set up on QUIC.cloud to use QUIC.
If QUIC.cloud is working properly, your site should be using QUIC. You can use a browser extension to verify this, such as this for Google Chrome. It will show a Green lightning bolt indicator, if your website is using QUIC.

Alternatively, you could use HTTP/3 Check to test it out.
That’s it. QUIC.cloud CDN should now be set up. If you have any questions or issues, please contact us at support[at]quic.cloud.